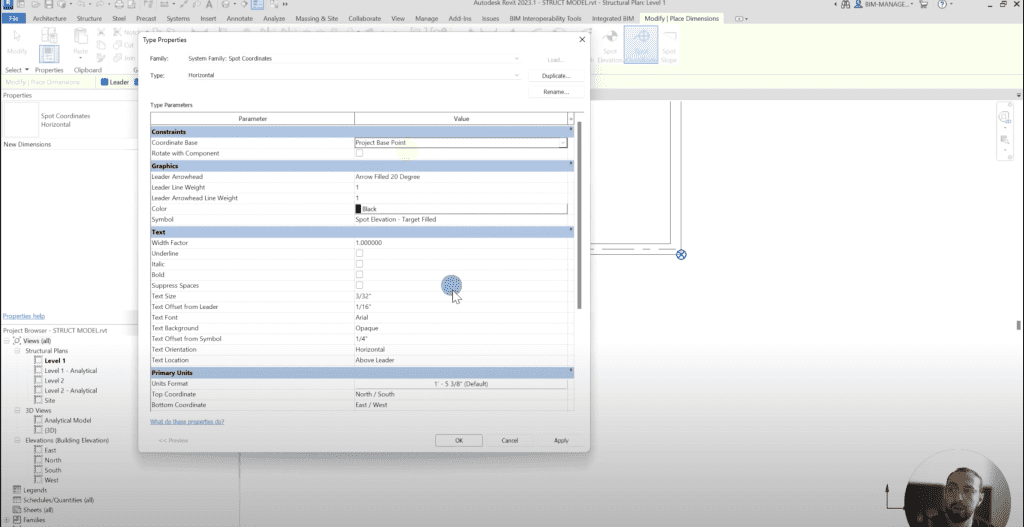
When working in Revit, understanding how to manage and manipulate key reference points is crucial for ensuring your project’s accuracy and coordination. One of the most important reference points is the project base point. In this article, we’ll explore what the project base point is, how it works, and specifically how to move the project base point Revit without compromising your project data.
What is the Project Base Point in Revit?
The project base point in Revit is a reference marker that represents the origin point for the project’s coordinate system. Unlike the internal origin, which is fixed and cannot be moved, the project base point provides flexibility. It allows you to adjust your model’s reference point according to the needs of your project, without altering the overall design.
How Project Base Point Works
The project base point serves as the zero point for your project’s coordinate system. This means that it’s where your project’s coordinates begin, allowing you to measure distances and positions relative to this point. The project base point can be moved as needed, giving you the ability to adapt your project without shifting the entire model or affecting the internal origin.

How to Move the Project Base Point Revit
Moving the project base point in Revit is a simple process that offers significant flexibility for your project. Here’s a step-by-step guide on how to do it:
Step 1: Locate the Project Base Point
First, you need to ensure that the project base point is visible in your Revit model. You can do this by:
- Going to the Visibility/Graphics settings.
- Ensuring that the project base point is turned on inside the site category.
Step 2: Select the Project Base Point
Once visible, the project base point will appear as a small circle with an X inside it. You can click on this marker to select it.
Step 3: Move the Project Base Point
- After selecting the project base point, you can move the project base point Revit by simply dragging it to your desired location.
- As you move it, you’ll notice that the coordinates and values associated with the project base point update automatically, reflecting its new position.
Step 4: Adjust Coordinates and Reference Points
When you move the project base point Revit, it’s important to remember that this action will affect how spot coordinates and other measurements are calculated. For example, if you use the annotate tab to create spot coordinates based on the project base point, these will now reflect the new location of the base point.


Why You Might Want to Move the Project Base Point Revit
There are several scenarios where you might need to move the project base point Revit
- Adjusting for Site Conditions
- If the initial project setup did not consider certain site conditions, you can move the project base point to align better with the site’s boundaries or features.
- Aligning with Survey Data
- If you receive updated survey data that indicates a different origin point, moving the project base point allows your model to reflect this new information without having to start over.
- Coordination with Other Models
- When working on complex projects involving multiple linked models, moving the project base point can help ensure that all models align correctly.
Best Practices for Moving the Project Base Point
While it’s easy to move the project base point Revit, there are some best practices you should keep in mind to ensure your project remains accurate:
Keep the Project Base Point and Internal Origin Aligned Initially
It’s generally recommended to align the project base point with the internal origin at the beginning of your project. This alignment helps avoid confusion and ensures that your model’s reference points are consistent.
Avoid Frequent Changes
Try to minimize the number of times you move the project base point. Frequent changes can lead to confusion, especially if the model is being shared among multiple team members or linked with other models.
Use Spot Coordinates for Verification
After moving the project base point, use spot coordinates to verify that the new location aligns with your project requirements. This step ensures that your reference points are accurate and that all measurements are based on the correct origin.
Understanding how to move the project base point Revit is a valuable skill that gives you flexibility in managing your model’s reference points. Whether you’re adjusting for site conditions, aligning with survey data, or coordinating with other models, moving the project base point allows you to make necessary changes without compromising your project’s integrity.
By following the steps outlined in this guide and adhering to best practices, you can effectively manage your Revit projects with confidence. For more in-depth tutorials and expert advice, subscribe to our YouTube channel and watch the full video on the topic.
If you need tailored solutions for your projects, consider our BIM consulting services for centralized workflows and best practices. Book a free consultation today!


