Understand How Spot Elevations, Levels, and Spot Coordinates Work with Revit Internal Origin
When working on architectural projects in Revit, understanding how the Revit internal origin affects spot elevations, levels, and spot coordinates is crucial for accurate project placement and data management. In this article, we’ll analyze the intricacies of these features, ensuring you have a solid grasp on how to effectively use them in your projects.
What is Revit Internal Origin?
The Revit internal origin is a fixed point in the model space that serves as the reference for all coordinate data in Revit. This point is essential for ensuring consistency and accuracy across different project elements. Let’s explore how this internal origin interacts with spot elevations, levels, and spot coordinates.
How Spot Elevations Work with Revit Internal Origin
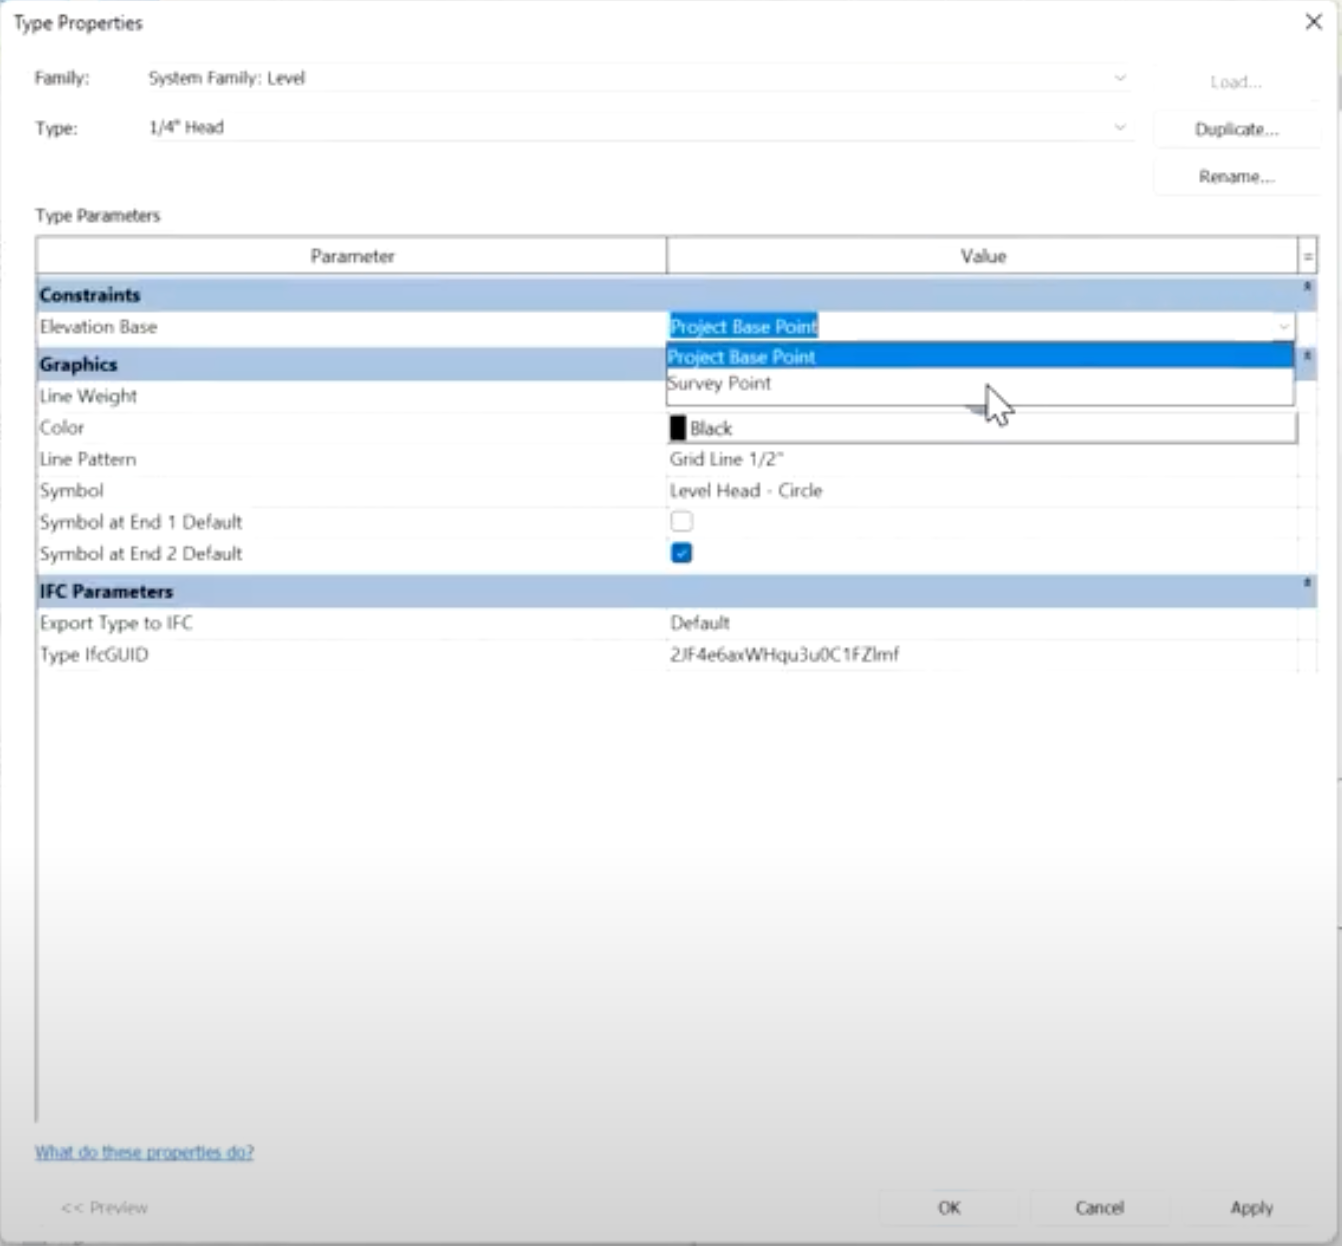
Spot elevations are used to measure the height of a specific point in your model relative to a reference point. In Revit, you can choose between the project base point, survey point, and internal origin for these measurements. Understanding how each reference point affects your data is key.
Setting Up Spot Elevations
- Access Spot Elevation Tool:
– Navigate to the Annotate tab and select Spot Elevation.
– Choose the reference point: project base point or internal origin.
- Using Project Base Point:
– This option references the height from the project’s designated base level.
– Ideal for project-specific measurements where relative heights are critical.
- Using Internal Origin:
– Select this to measure heights based on the fixed Revit internal origin.
– Provides a consistent reference point, especially useful for coordination across multiple projects.
Understanding Levels with Revit Internal Origin
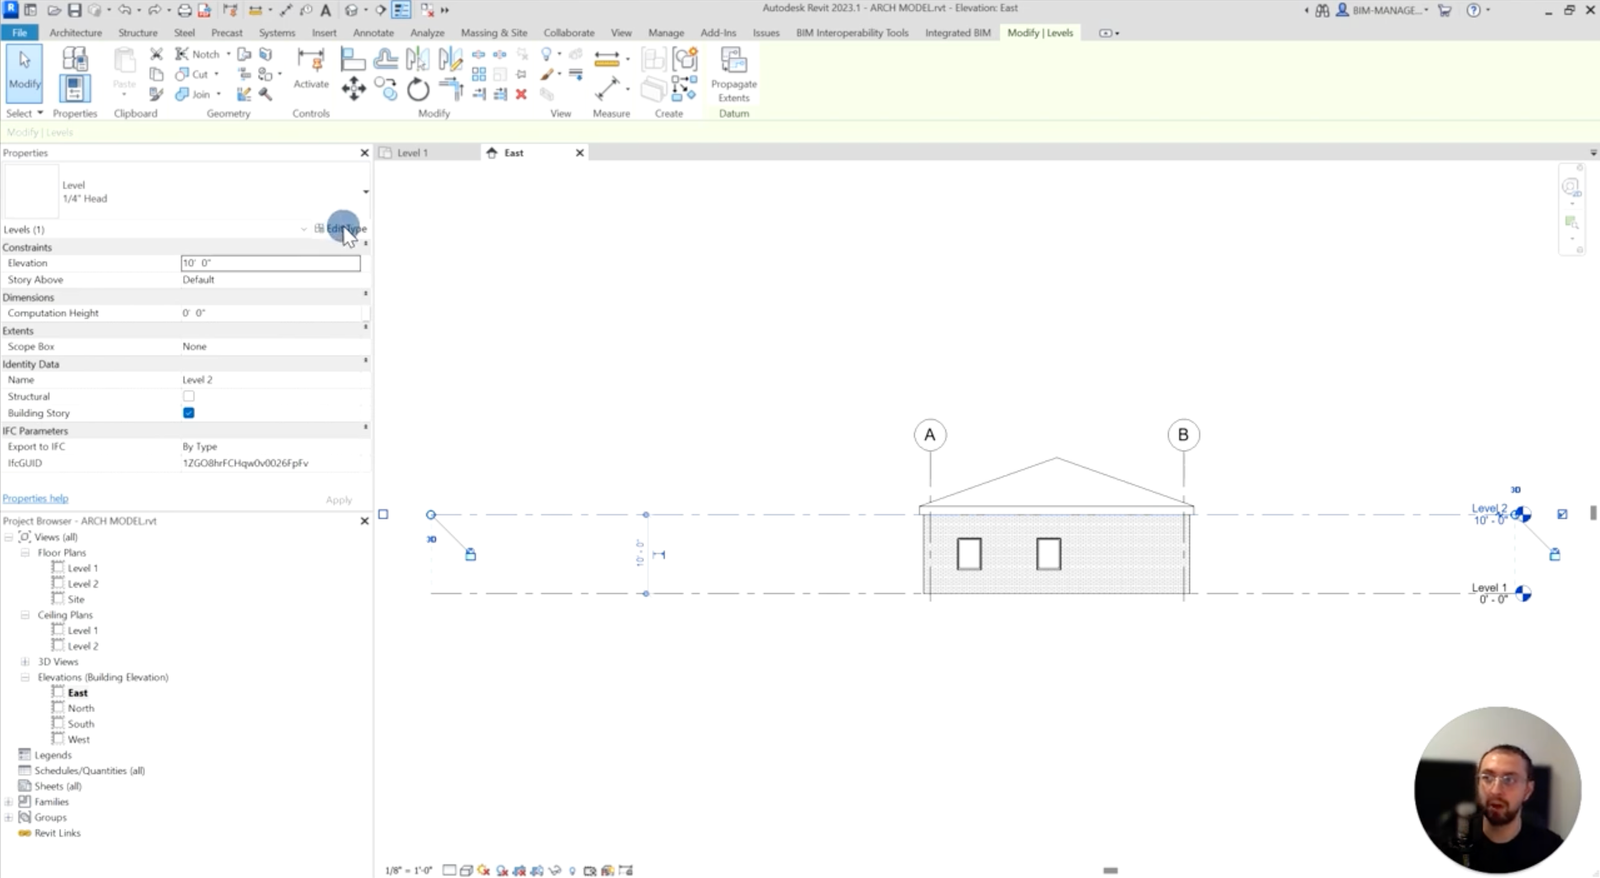
Levels in Revit represent different heights or floors within your project. These can be referenced to the project base point or the survey point but are fundamentally linked to the internal origin for consistency.
Setting Up Levels
- Creating Levels:
– Go to the Architecture tab and select Level.
– Place the level in your model space, ensuring it aligns with the desired reference point, always from an elevation or a section
- Referencing Internal Origin:
– Levels can be adjusted to show heights relative to the Revit internal origin, ensuring uniformity in multi-level projects.
– Helps in maintaining accurate vertical data across the entire project.
How Spot Coordinates Work with Revit Internal Origin
Spot coordinates are used to pinpoint exact locations in your project space. They can reference the project base point, survey point, or internal origin, each providing unique advantages.
Setting Up Spot Coordinates
- Access Spot Coordinate Tool:
– Navigate to the Annotate tab and select Spot Coordinate.
– Choose the reference type: project base point, survey point, or internal origin.
- Using Internal Origin for Spot Coordinates:
– Opting for the Revit internal origin ensures that all coordinates are measured from a fixed, central point.
– Ideal for large projects where precise location data is necessary for coordination and alignment.
Practical Tips for Using Revit Internal Origin
1. Consistent Reference Points
– Always ensure your project base point, survey point, and internal origin are correctly set up before starting your project.
– This consistency helps avoid discrepancies and errors in measurements and coordinates.
2. Visibility Graphics
– Activate visibility graphics to showcase different reference points within your project.
– Navigate to the View tab, select Visibility/Graphics, click Site category and ensure the internal origin is visible.
3. Real-World Context
– Use the survey point to align your project with real-world coordinates and elevations.
– This is particularly useful for projects that need to adhere to geographic data and sea levels.
Understanding how the Revit internal origin interacts with spot elevations, levels, and spot coordinates is essential for accurate and efficient project management. By setting up your reference points correctly and leveraging the internal origin, you can ensure that your data is consistent and reliable.
Embrace the power of precise project management with Revit’s internal origin and elevate your architectural projects to new heights. For more in-depth tutorials and expert advice subscribe to our Youtube channel and watch our step-by-step video explanation.
If you need tailored solutions for your projects, consider our BIM consulting services for centralized workflows and best practices- Book a free consultation today!

