If you’re new to Revit or looking to refine your skills, understanding how to split walls in Revit and how to merge walls is essential. In this guide, we’ll walk you through the step-by-step process of splitting and merging walls in Revit. This practical tutorial is designed to help you manage wall components efficiently without disrupting your workflow.
How to Split Walls in Revit
Splitting walls in Revit can help you create complex designs and manage individual wall segments more effectively. Here’s how to split walls in Revit:
1. Creating a New Wall:
– Start by selecting the wall tool.
– Click and drag with your mouse to draw the wall. If you don’t click multiple times, it will be one continuous wall of the same type.
2. Using the Split Tool:
– Go to the Modify tab.
– Select the Modify panel and choose Split Element.
– Click on the wall where you want to split it. You can split the wall at multiple points if needed. Each segment will still be part of the same wall type.
3. Checking the Split:
– Hover over the wall to see the split sections. This will confirm that the wall has been divided into multiple components.
Avoiding Common Mistakes
– Do Not Delete Wall Segments: Deleting wall segments can remove hosted elements like windows and doors, along with their tags and dimensions.
– Handle Hosted Elements with Care: Ensure hosted elements remain intact by splitting walls correctly rather than deleting and redrawing sections.
How to Merge Walls in Revit
Merging walls in Revit ensures that your wall segments are unified into a single component, which is crucial for maintaining the integrity of your design. Here’s how to merge walls in Revit:
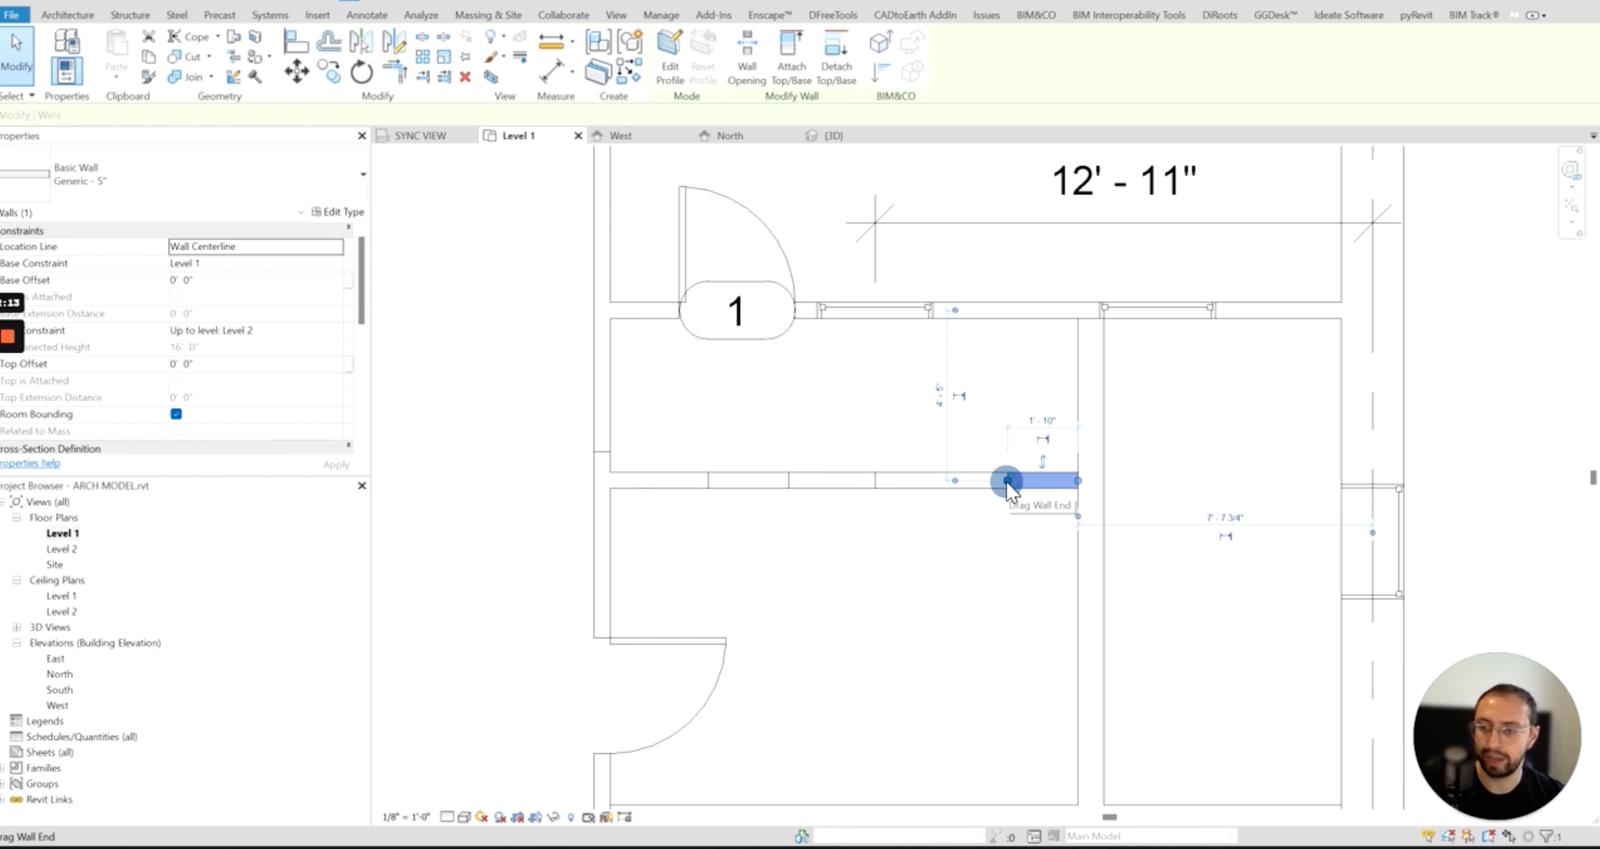
Selecting Walls to Merge:
– Click on a wall segment to select it.
– Drag the wall to snap it to the endpoint of the adjoining wall segment.
Using the Allow Join Feature:
– Right-click on the wall to check the join status.
– If it says Disallow Join, change it to Allow Join.
– This will enable the wall segments to merge into one continuous wall.
Ensuring a Proper Merge:
– Sometimes walls do not merge automatically. Ensure the Allow Join option is active.
– Click to finalize the join, ensuring that all wall segments are properly aligned and connected.
Troubleshooting Merging Issues
– Check Join Status: Always verify the join status of your walls. If segments are not merging, ensure Allow Join is activated.
– Avoid Redrawing Walls: Instead of deleting and redrawing walls, use the drag and snap method to maintain the integrity of your hosted elements and dimensions.
Practical Tips of How to Splitting and Merging Walls
Efficient Navigation and Use of Tools
– Use Modify Tab Tools: The tools in the Modify tab, like Split Element, are essential for efficiently splitting and merging walls.
– Drag and Snap Method: This method helps in quickly merging walls without losing associated elements and data.
Maintaining Design Integrity
– Handle Hosted Elements Carefully: Whether you’re splitting or merging walls, ensure that windows, doors, and other hosted elements remain intact to avoid unnecessary rework.
– Check Dimensions and Tags: After splitting or merging walls, verify that all dimensions and tags are correctly updated to reflect the changes.
Understanding how to split walls in Revit and how to merge walls in Revit is crucial for effective project management and design integrity. By following the steps outlined in this guide, you can confidently handle wall components in your Revit projects.
Embrace the power of efficient wall management in Revit and watch your project productivity soar. Happy modeling!
For more in-depth tutorials and expert advice subscribe to our Youtube channel and watch our step-by-step video on How to split walls in Revit explanation.
If you need tailored solutions for your projects, consider our BIM consulting services for centralized workflows and best practices- Book a free consultation today!